Table of Contents
ToggleKey Takeaways
- Cavities aren’t just black holes; they begin as subtle changes like white spots.
- The visual appearance of decay changes significantly as it progresses through stages.
- Hidden cavities, especially between teeth or under fillings, often require X-rays for detection.
- Several things, including stains and natural tooth anatomy, can be mistaken for cavities.
- Early identification through visual cues and professional check-ups is crucial for less invasive treatment.
What Do Cavities Look Like: Signs You Shouldn’t Ignore
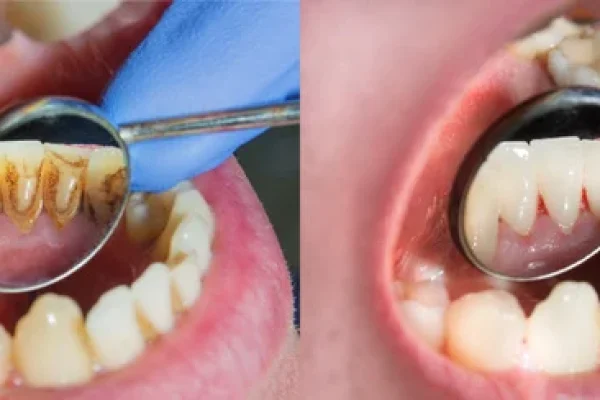
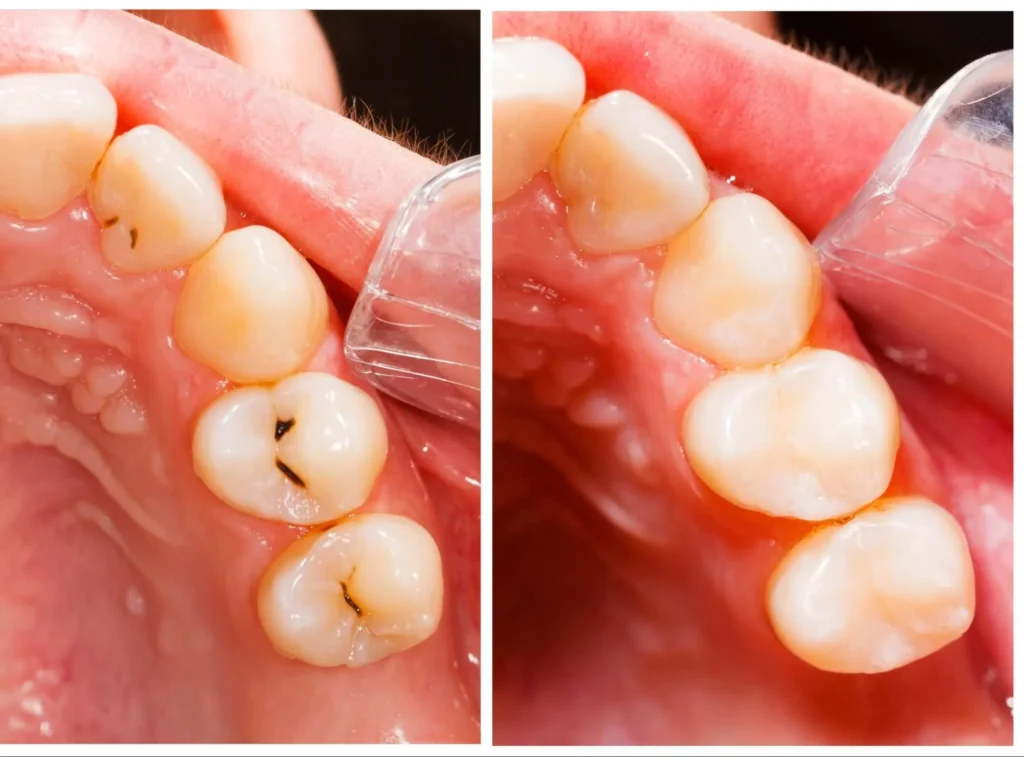
Stepping beyond the simplistic caricature, the true face of a cavity is multifaceted, a chameleon of dental distress. It doesn’t always announce itself with a glaring black void. Often, its initial appearance is far more understated, a subtle shift in colour or texture that speaks volumes if you know how to listen. Think of it like a crack in a foundation – it starts small, barely perceptible, before widening into something structurally unsound. The colours cavities can don are varied: sometimes they start as ghostly white spots, areas where the enamel has begun to lose its essential minerals, appearing chalky or opaque compared to the surrounding translucent tooth structure. These white lesions are often the earliest visual cue, a flag of demineralization waving before a true ‘hole’ forms. As the decay progresses, it can stain, picking up pigments from food and drink, morphing into shades of light brown, dark brown, or yes, eventually, black. These aren’t just surface stains; they represent areas where the tooth structure is softening, becoming porous, and literally changing colour as bacteria and debris infiltrate. Beyond colour, there are changes in texture. Run your tongue over a healthy tooth, and it should feel smooth, solid, perhaps with natural grooves. A developing cavity might feel rough, slightly sticky, or even have a discernible catch or pit when probed gently (though probing should ideally be left to professionals to avoid causing further damage). A more advanced cavity might present as a clear, undeniable hole, a physical breach in the tooth’s surface that you can see or feel distinctly. These visual signs are often, but not always, accompanied by physical symptoms. You might notice increased sensitivity to hot or cold temperatures, a twinge when biting down, or even spontaneous pain that seems to come from nowhere. Sometimes food gets caught in a new pit or hole, causing irritation. These symptoms act as a secondary alarm system, urging you to investigate the visual clues more closely. But remember, symptoms are unreliable; some cavities, especially slow-growing ones or those on non-biting surfaces, can progress significantly without causing any noticeable discomfort until they reach the nerve. This is why understanding the visual aspect is paramount, giving you a chance to spot trouble before it starts shouting.
How Do You Tell if It’s a Cavity or Not?
So, you’ve spotted something suspicious – a discoloured patch, a rough spot, a nagging sensitivity. The immediate, burning question follows: is this the beginning of the end for my tooth, or just… Monday morning coffee stain? This is where the rubber meets the road, and the blunt truth is that definitive self-diagnosis is, for most of us untrained civilians, somewhere between difficult and outright impossible. Our mouths are complex landscapes, full of nooks, crannies, natural variations, and historical modifications (hello, old fillings!). What looks like a cavity to you might be something entirely benign. You can certainly perform a visual inspection, peering into the mirror, angling your head this way and that. You can look for those common signs we discussed – the white, brown, or black discolourations that don’t brush away, the areas that feel rough or catch your floss, or any visible pits or holes. Pay attention to areas prone to decay: the chewing surfaces of back teeth, the smooth sides near the gum line, and crucially, the tight spaces between teeth that are difficult to clean effectively. However, these visual cues are just clues, not convictions. Stains from coffee, tea, or tobacco can mimic the dark appearance of decay. Natural pits and fissures on chewing surfaces can look like cavities starting, but are just the tooth’s normal topography. Even old dental work can develop marginal staining that looks suspiciously like decay around the edges. This is precisely why the dental professional exists. A dentist possesses both the trained eye and the specialised tools required for accurate diagnosis. They use a small, pointed instrument called an explorer (used gently, unlike the painful probing of yesteryear) to feel the tooth surface for softness or stickiness indicative of decay. More importantly, they utilise dental X-rays. These radiographs can reveal decay hiding between teeth (interproximal decay), under existing fillings, or deep within the tooth structure – areas entirely invisible during a mirror examination. An X-ray shows how far decay has penetrated the tooth layers (enamel, dentin, pulp), providing a crucial piece of the diagnostic puzzle that mere visual inspection simply cannot offer. So, while you can be a diligent observer and note potential issues, the final, authoritative word on whether that spot is a cavity or not belongs squarely to your dentist. They are the experts equipped to navigate the visual ambiguities and confirm the diagnosis, guiding you towards the correct course of action.
Can You See Cavities in the Mirror?
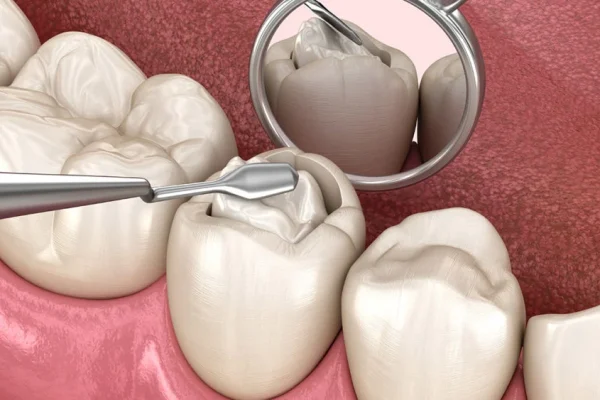
The mirror is your first, most accessible tool for a dental check-up, a readily available window into the world inside your mouth. And yes, sometimes, you can see cavities reflected back at you. But let’s be clear: relying solely on a mirror is like trying to map a complex cave system with only a flashlight pointing straight ahead. The visibility of a cavity in a mirror depends almost entirely on its size and, perhaps even more critically, its location. A large cavity, particularly one that has progressed significantly and created a noticeable hole or a prominent dark area on the easily viewable surfaces of your teeth (like the chewing surfaces of molars or the front surface of anterior teeth), is often quite visible in a mirror. If you angle the mirror correctly and have good lighting, you might spot the discolouration, the change in texture, or the outright physical defect. However, the vast majority of cavities, especially in their crucial, early stages where they are most easily treated or even reversed, are small. And many develop in places that are simply impossible to see clearly, if at all, with a standard mirror and the limited angles of your own mouth. Think about the areas between your teeth – the interproximal surfaces. These are prime real estate for decay, as food particles and bacteria love to linger here, and these spots are notoriously difficult to clean with just brushing. Looking in a mirror, you simply cannot see the tight contact points between adjacent teeth where decay often begins its insidious work. Cavities can also form along the gum line, particularly if gums have receded slightly, or even around the edges of existing fillings or crowns. These areas, while sometimes partially visible, can be tricky to examine thoroughly without proper dental instruments to retract tissue or illuminate specific spots. Furthermore, the type of decay matters. Early demineralization often appears as a subtle white spot, which can be incredibly difficult to distinguish from healthy enamel, especially under less-than-optimal bathroom lighting. It lacks the obvious contrast of a brown or black lesion. So, while a mirror can catch the big, undeniable problems, it offers a severely limited view. Small cavities, hidden cavities, or those just starting as subtle changes in enamel texture or translucency will likely escape your notice. This limitation underscores why regular dental check-ups, which include professional examination and diagnostic tools like X-rays, are absolutely essential for catching decay before it becomes visible in your bathroom mirror. Self-examination is a useful first step for noticing obvious changes, but it is far from a comprehensive diagnostic tool.
What Can Be Mistaken for a Cavity?
Ah, the dental doppelganger. It turns out not everything that looks suspicious in your mouth is necessarily a cavity plotting your tooth’s demise. Our teeth are complex structures, and over a lifetime, they accumulate various marks, changes, and natural irregularities that can easily send a shiver of false alarm down your spine. One of the most common look-alikes? Stains. Coffee, tea, red wine, certain foods, and tobacco products are notorious for leaving behind pigments that can latch onto the surface of your enamel, particularly in the natural pits and grooves on the chewing surfaces of back teeth or along the gum line. These stains can range in colour from yellow to brown to black, visually mimicking the appearance of decay. The key difference, which isn’t always easy to discern without tactile examination or magnification, is that stains are typically superficial; they sit on the surface of the enamel and don’t represent a breakdown of the tooth structure underneath. A dentist can often distinguish a stain from decay using their explorer tool, feeling if the area is hard and smooth (stain) or soft and sticky (decay). Natural developmental grooves and fissures on the chewing surfaces of molars and premolars can also appear cavity-like. These are just the normal valleys and folds in the tooth’s anatomy, sometimes naturally stained or slightly darker than the surrounding enamel. They are not decay unless bacteria have actively started breaking down the tooth structure within them. Old dental fillings themselves, particularly amalgam (silver) fillings, can discolour over time, sometimes appearing dark or stained around their edges, which can be mistaken for recurrent decay. However, the dark area is often just tarnish or staining of the filling material itself, not necessarily active decay in the tooth next to it (though decay can occur around old fillings, which complicates matters!). Other possibilities include enamel hypoplasia or hypocalcification, which are developmental defects in the enamel that can appear as white, yellow, or brown spots or lines. These are not active decay but are weaker areas of enamel that can be more prone to developing cavities. Even calculus (hardened plaque, also known as tartar) can sometimes be mistaken for decay, especially if it’s stained dark, although it typically forms along the gum line and feels very hard. The crucial point, reiterated yet again because it bears repeating, is that while you can observe these visual anomalies, only a trained dental professional can accurately differentiate between a harmless stain, a natural tooth feature, an old filling’s discolouration, or genuine tooth decay. Their examination combines visual inspection with tactile probing, understanding of tooth anatomy, patient history, and often, diagnostic X-rays to make the definitive call.
How to Tell the Difference Between a Cavity and a Filling?
Navigating the landscape of your teeth, you might encounter various shapes and colours that aren’t quite “normal” enamel. Distinguishing between a cavity that’s actively destroying tooth structure and a dental filling that was placed to repair a cavity can sometimes be confusing, especially with older or discoloured restorations. However, fillings have distinct characteristics that usually give them away compared to active decay. Firstly, consider the appearance of typical dental fillings. Amalgam fillings, the classic “silver” ones, are actually a mix of metals and appear distinctly metallic, ranging from bright silver when new to dark grey or black over time due to tarnish. Composite resin fillings, the “white” or tooth-coloured ones, are made of a plastic and glass mixture designed to blend in with the natural tooth. While they aim for invisibility, they often have a slightly different translucency or texture than the surrounding enamel and can sometimes stain over the years, picking up a yellowish or brownish hue. The most telling characteristic of a filling, regardless of material, is its defined margin. A filling is a patch placed into a prepared space. This preparation creates distinct walls and edges, and when the filling material is placed and shaped, it typically has a discernible boundary where it meets the natural tooth structure. Think of it as a piece of pavement patching a pothole – there’s a clear line where the patch ends and the old road begins. Active cavities, particularly in their early stages, tend to be more irregular in shape and blend more subtly into the surrounding tooth structure as they erode it. There might be a gradual change in colour or texture rather than a sharp boundary. Cavities often start in specific vulnerable spots (pits, grooves, between teeth) and spread outwards. Fillings are placed in the area where the cavity was, filling the space left behind. However, a key point of confusion arises with old fillings. Decay can begin to form around the edges of an aging filling if the seal between the filling and the tooth breaks down, allowing bacteria to sneak underneath. In this scenario, you might see discolouration or feel a soft spot right next to the filling’s margin. This is indeed decay, but it looks like a cavity adjacent to a filling. The filling itself will still look like a filling (metallic or a distinct tooth-coloured patch), but the problematic area will be the compromised tooth structure immediately surrounding it. A dentist can use their instruments to check the integrity of the filling’s margins and probe for softness, and X-rays are invaluable here, as they can often show decay developing underneath a filling that is completely invisible from the surface. So, while a defined shape and distinct margin are strong indicators of a filling, and irregular blending points towards a cavity, the possibility of recurrent decay around old work means professional assessment is always the most reliable way to differentiate.
What Does Tooth Decay Look Like?
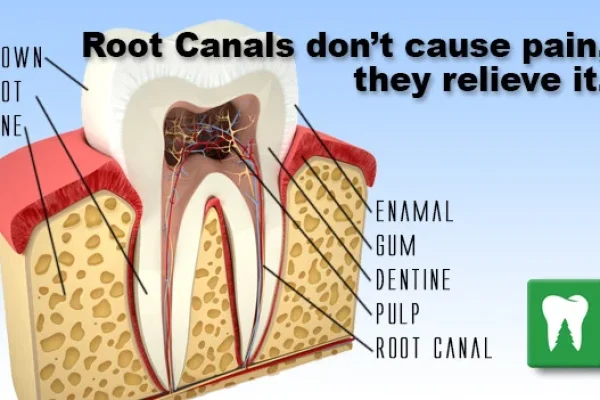
Let’s zoom out for a moment and understand the overarching term: tooth decay. A cavity, strictly speaking, is the result of tooth decay, a late-stage manifestation where the demineralization process has progressed to the point of forming a physical hole or lesion in the tooth structure. Tooth decay itself is the broader, ongoing process where acids produced by bacteria in plaque erode the hard outer layers of the tooth – first the enamel, then the softer dentin beneath. This process doesn’t start as a black hole; it begins subtly, almost imperceptibly, at a microscopic level. The initial visual signs of tooth decay are often far less dramatic than the word “cavity” implies. As mentioned before, the very first visible change is frequently the appearance of white spots on the tooth surface. These aren’t just surface marks; they represent areas where the enamel’s crystalline structure has been weakened by acid, losing calcium and phosphate minerals. The enamel in these spots becomes more porous and loses its natural translucency, appearing opaque and chalky, especially when the tooth surface is dry. These white spot lesions are often found near the gum line or in the pits and grooves of chewing surfaces. Crucially, at this white spot stage, the decay process is potentially reversible through good oral hygiene, fluoride exposure (which helps remineralize the enamel), and dietary changes. It’s tooth decay, but it’s not yet a structural cavity, not yet a breach that requires drilling and filling. However, if the acid attacks continue and outweigh the tooth’s natural repair mechanisms (remineralization), the decay progresses. The demineralized area gets larger and deeper, reaching the dentin. At this point, the softened enamel surface may collapse, or the porous dentin beneath may stain, leading to the appearance of brown or black discolouration. This is typically when a “cavity” as most people picture it begins to form – a visible pit or hole. The transition from an invisible acid attack to a white spot lesion to a pigmented spot to a full-blown cavity is a continuous spectrum of the tooth decay process. Understanding this progression is vital because the earlier you can identify the visual cues of decay – starting with those subtle white spots – the better the chance of stopping or even reversing the damage before it requires more invasive dental treatment. Tooth decay looks different at every step of its journey, and recognising the initial visual whispers is your best defence against the later, more painful shouts of an established cavity.
What Does a Cavity Look Like at Every Stage?
Understanding tooth decay isn’t a static exercise; it’s like tracking the progression of a storm, from a faint cloud on the horizon to a full-blown tempest. The visual appearance of a cavity changes dramatically as it marches through the layers of your tooth. Thinking about “cavity stages” or the visual signs associated with “rotting teeth stages” provides a far more accurate picture than just imagining a single type of defect. It’s a journey from nearly invisible vulnerability to outright destruction, and catching it early is everything. The mouth is a battleground, and decay’s tactics evolve. Initially, the attack is subtle, a chemical assault on the enamel that leaves no immediate trace visible to the naked eye. But as the assault continues, the tooth begins to show signs of distress. These stages are not always perfectly distinct lines in the sand, but a continuum of worsening damage, each phase presenting its own set of visual cues and potential symptoms. The good news is that the appearance of decay in its earliest stages serves as a critical warning signal. These initial signs often indicate damage that is confined to the enamel and hasn’t yet broken through its outer shell. This is the golden window of opportunity, a time when the decay process might still be halted or even reversed through enhanced oral hygiene, fluoride treatments, and dietary modifications. Once the decay progresses further, breaking into the dentin and forming a true cavity, the damage becomes irreversible; the missing tooth structure cannot be magically put back, and a filling or other restorative treatment becomes necessary. The visual changes are tied directly to which layer of the tooth is being affected and how deeply the acid has penetrated. From the earliest mineral loss in the enamel to the invasion of the softer dentin and eventually the sensitive pulp, the visual story of decay is one of increasing discolouration, deepening penetration, and growing physical destruction. Recognising these different looks is key to appreciating the urgency of dental care at each phase.
What Is a Stage 1 Early Cavity?
Okay, let’s talk about the absolute sneak attack, the whisper before the yell: the Stage 1 early cavity, often referred to clinically as an initial lesion. This isn’t the kind of cavity most people envision when they think of dental problems. There’s no dark hole, no throbbing pain. In fact, it might not even feel particularly rough to your tongue. What does it look like? Typically, a Stage 1 early cavity presents as a white spot lesion on the surface of the enamel. Imagine the enamel as a tightly packed crystal lattice; this white spot is an area where acids have begun to dissolve those minerals, primarily calcium and phosphate, from the lattice structure. The enamel in this spot becomes porous, less dense, and loses its natural transparency. This change in light reflection makes the area appear opaque and chalky white, standing out against the surrounding, healthier, more translucent enamel. These white spots are often easiest to see when the tooth surface is dry, as saliva can sometimes mask their appearance. They are frequently located near the gum line, where plaque tends to accumulate easily, or in the deep grooves and pits on the chewing surfaces. At this embryonic stage, the decay is confined entirely to the enamel. The outer surface is still largely intact, meaning there isn’t yet a physical breach or hole. This is incredibly significant because, as mentioned, a white spot lesion is potentially reversible. With diligent oral hygiene (brushing and flossing to remove plaque), reducing frequent exposure to sugary or acidic foods and drinks, and applying fluoride (which helps remineralize the weakened enamel by depositing new minerals back into the lattice), the enamel can actually repair itself. The white spot might disappear entirely or become much less noticeable as the tooth rebuilds its strength. Because the decay hasn’t reached the dentin, which contains microscopic tubes leading to the nerve, Stage 1 cavities are almost always painless. There’s no sensitivity to hot, cold, or sweets because the insulating layer of enamel is still largely complete, and the nerve is unaffected. This lack of symptoms is why they are so often missed by the individual and typically only spotted during a professional dental exam, where the dentist is specifically looking for these subtle changes in enamel texture and appearance, sometimes using magnification or drying the tooth surface to make the white spot more visible. Identifying and addressing decay at this Stage 1 white spot phase is the ideal scenario in dentistry – it’s intervention before destruction, prevention of a larger problem, and the best outcome for the tooth’s long-term health, requiring non-invasive or minimally invasive treatments instead of drilling and filling.
What Does a Small Cavity Look Like?
Moving along the continuum of decay, past the initial, reversible white spot, we arrive at the small cavity. This represents a stage where the demineralization has continued unchecked, breaching the outer barrier of the enamel and beginning to involve the dentin, the layer immediately beneath the enamel. Visually, a small cavity often appears as a pigmented spot, typically light brown or yellowish-brown, though it can sometimes already be dark brown or even black, depending on staining from food and drink. Unlike the chalky white spot of Stage 1, this discolouration is usually more embedded in the tooth surface. Instead of just a surface opacity, you might see or feel a slight indentation, a small pit, or a rough patch where the enamel structure has now definitely broken down and collapsed. It’s no longer just a change in mineral content; it’s a physical defect, albeit a small one. The size is key here – it’s still limited, often confined to the pit or fissure where it started, or a small area on a smooth surface or between teeth. However, because the decay has likely reached the dentin, things can change. Dentin is much softer than enamel and has a structure that facilitates the more rapid spread of bacteria and acid. While a small cavity might still be asymptomatic for some individuals, especially if it’s growing slowly or located in an area not subjected to chewing forces, it’s more common for sensitivity to start appearing at this stage. You might notice a fleeting sensitivity to cold drinks or sweets. This happens because the dentin layer contains tiny tubules that connect to the pulp (where the nerve resides). As the decay gets closer to the pulp, these tubules become exposed, allowing external stimuli like temperature changes or sugar to irritate the nerve, resulting in that characteristic twinge. Unlike Stage 1, a small cavity involving dentin is no longer reversible with just hygiene and fluoride; the physical damage requires repair. A dentist will typically remove the decayed tooth structure and fill the resulting small hole with a restorative material like composite resin or amalgam. While still a relatively straightforward procedure compared to more advanced stages, it’s the point of no return for the tooth structure itself. Identifying a small cavity visually – often a pigmented spot or subtle pit on the chewing surface or a visible discolouration between teeth – and getting it treated promptly is crucial to prevent its progression into a larger, more painful problem.
What Does a Stage 3 Cavity Look Like?
Now we’re progressing into territory that becomes harder to ignore. A Stage 3 cavity signifies moderate decay, meaning the process has moved well beyond the enamel and small superficial involvement of dentin, now constituting a significant breach in the tooth structure. Visually, a Stage 3 cavity is much more apparent than its earlier counterparts. You will very likely see a definite, visible hole or cavity (hence the name!) in the tooth surface. This hole might be funnel-shaped, with a smaller opening at the enamel surface but a wider area of decay spreading underneath within the softer dentin. The colour of the decay in a Stage 3 cavity is typically dark brown or black. This deep pigmentation is due to a combination of stained, decayed dentin and debris trapped within the lesion. The area might feel distinctly soft or leathery when gently probed, indicating the significant loss of mineral content and structural integrity. The boundaries of the cavity are usually irregular, reflecting the uneven nature of the decay process spreading through the tooth. While the decay hasn’t yet reached the pulp (the nerve tissue) in a Stage 3 cavity, it is significantly closer. Because the decay is deeper and involves a larger area of dentin, symptoms become much more common and pronounced at this stage. You are highly likely to experience increased sensitivity to hot and cold temperatures, as well as sweets. This sensitivity might linger for a short time after the stimulus is removed. Pain while biting down on the affected tooth is also a frequent symptom, especially if the chewing forces are directly impacting the weakened area. Sometimes, food can get lodged in the visible hole, causing pressure and discomfort. At this stage, a simple filling is usually still the required treatment, but the filling will be larger and deeper than that needed for a small cavity. The dentist must remove all the infected and softened tooth structure before placing the restorative material. If left untreated, a Stage 3 cavity will inevitably progress, getting closer and closer to the pulp, setting the stage for more severe pain and potentially requiring more complex and costly treatments like root canals or even extraction. Identifying a Stage 3 cavity visually – by spotting a definite dark hole or significant discolouration and experiencing accompanying sensitivity or pain – means it’s time to see a dentist without delay.
What Does a Bad Cavity Look Like?
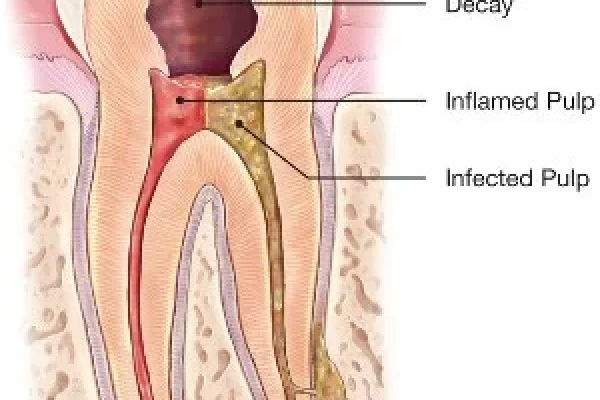
When we talk about a “bad cavity,” we’re venturing into the later, more severe stages of tooth decay – Stage 4 and potentially beyond, depending on the classification system used. This is where decay has gone unchecked for a considerable time, resulting in extensive damage to the tooth structure and often reaching the dental pulp, the innermost part of the tooth containing nerves and blood vessels. Visually, a bad cavity is undeniable. It will typically appear as a large, deep, dark lesion, often black or deep brown, that has destroyed a significant portion of the tooth crown. You might see a large, gaping hole, a crater-like defect, or even the collapse of entire cusps (the points on the chewing surface). The remaining tooth structure might look fragile, discoloured, or even crumbly. In very advanced cases, the decay might extend so deeply that you can see into the tooth’s interior or even potentially see exposed pulp tissue, which would appear reddish or pinkish. The surrounding enamel and dentin will be extensively softened and demineralized. This level of decay is often described in terms of “rotting teeth stages” because the tooth structure is literally decaying and breaking down. Symptoms associated with a bad cavity are usually severe and persistent. Because the decay has likely invaded or come very close to the pulp, the nerve becomes infected or severely irritated. This commonly results in intense, throbbing pain that might be constant or worsen with hot or cold stimuli, pressure, or even spontaneously. The pain can be excruciating and might radiate to the jaw or ear. An infection can develop in the pulp or spread beyond the root tip into the surrounding bone, leading to swelling, tenderness in the gums or jaw, and sometimes even a visible pus-filled abscess (a dental boil). This infection can cause systemic symptoms like fever and general malaise and is a serious health issue requiring immediate attention. Treatments for a bad cavity are much more complex than simple fillings. If the pulp is infected, a root canal treatment is usually necessary to remove the infected tissue, disinfect the canal system, and seal the tooth. If the tooth structure is too severely compromised to be restored with a filling or crown after a root canal, extraction might be the only option. Seeing a large, dark hole, experiencing severe pain, or noticing swelling around a tooth are clear visual and symptomatic indicators of a bad cavity that requires urgent professional dental care.
What Does a Cavity Look Like On a Front Tooth?
Cavities on front teeth (incisors and canines), while perhaps less common than those on molars due to the smoother surfaces and easier access for cleaning, are often far more aesthetically distressing when they do occur. The appearance of decay on anterior teeth (“front tooth caries” or “caries on front teeth”) can vary depending on the stage and location, but because these teeth are so visible, even early signs are often more noticeable to the individual and others. On the smooth front or back surfaces of the incisors and canines, decay often begins as a white spot lesion near the gum line. As discussed, this represents early demineralization. Because the enamel on front teeth can be thinner than on molars, these white spots might progress more quickly. If the decay isn’t reversed, it will eventually stain brown or black, creating a highly visible, dark spot or pit on the tooth surface that significantly mars the smile’s appearance. Decay can also frequently occur on the surfaces between front teeth. These interproximal cavities are harder to spot visually without floss or dental tools but can sometimes be seen as a dark shadow visible through the enamel from the front or back. If the decay progresses significantly, it will break through the surface, creating a noticeable hole on the side of the tooth or near the contact point with the adjacent tooth. Another common, though less frequent, area for front tooth cavities is the small pits or grooves on the lingual (tongue side) surfaces of the incisors, particularly near the gum line. Decay starting here might be hidden from casual view but can still progress significantly. Because the enamel and dentin layers are relatively thin in front teeth compared to molars, decay can reach the pulp (nerve) more quickly once it penetrates the outer layers. This means a cavity on a front tooth might become symptomatic (sensitive or painful) sooner than a similarly sized cavity on a back tooth. The cosmetic impact of front tooth decay is a major concern for most people, making early detection and treatment particularly important. Even small discolourations or chips caused by decay can be very noticeable. Treatment often involves aesthetic composite resin fillings that are carefully colour-matched to blend seamlessly with the surrounding tooth structure. In more advanced cases, veneers or crowns might be needed to restore both function and appearance. Being vigilant about spotting any subtle changes in colour or texture on your front teeth, especially near the gums or between the teeth, is key to catching decay when it’s small and treatable with minimal aesthetic compromise.
What Does a Cavity Look Like On a Molar?
Molars and premolars, the workhorses at the back of your mouth, are particularly susceptible to cavities, and their appearance can be quite different from decay on smooth-surfaced front teeth. This is largely due to their complex anatomy, especially the chewing surfaces. The top surfaces of molars are covered in pits and fissures – natural grooves and valleys that are highly effective at grinding food but also excellent at trapping plaque, food particles, and bacteria. These pits and fissures are the most common starting point for cavities on molars. Decay starting here often presents as a dark spot or line within a groove. Initially, it might just look like staining, but a dentist can tell if the area is soft or sticky with an explorer, indicating active decay within the fissure. As the decay progresses, the area around the pit or fissure will expand, becoming a larger, darker spot or a visible pit or hole. The decay often spreads laterally within the dentin once it gets through the enamel, undermining the surrounding enamel walls, which can eventually crack or collapse under chewing pressure, revealing a larger cavity than might have been initially apparent on the surface. Another common site for molar cavities is the surfaces between the teeth (interproximal surfaces). Just like with front teeth, the tight contact points between adjacent molars are difficult to clean effectively with just a toothbrush, making them vulnerable to decay (“cavity side tooth,” “side cavity tooth”). Interproximal cavities on molars are almost impossible to see visually without the aid of dental floss (which might tear or catch) or, more reliably, dental X-rays. On an X-ray, these cavities appear as dark triangles or notches on the sides of the teeth. When these cavities between molars become very large, they might eventually break through to the chewing surface or the cheek/tongue side, becoming visible as a large hole or dark area. Wisdom teeth (third molars), located at the very back, are especially prone to decay because they are often partially erupted, difficult to clean due to their position, and sometimes impacted or angled awkwardly, creating food traps. Cavities on wisdom teeth can look like those on other molars, starting in pits and fissures or on the side surfaces, but their difficult location makes both cleaning and treatment more challenging. Symptoms of molar cavities can include sensitivity to hot, cold, or sweets, and pain when chewing on the affected tooth, especially as the cavity deepens and gets closer to the pulp within the tooth’s roots. Because molars are critical for chewing, cavities here can significantly impact function and comfort. Visualizing molar cavities, particularly those between the teeth or just starting in the deep fissures, is challenging for self-examination, reinforcing the need for regular dental check-ups where a dentist can use mirrors, lights, explorers, and X-rays to get a complete picture of these harder-to-reach areas.
What Does a Hidden Cavity Look Like?
The term “hidden cavity” sounds a bit cloak-and-dagger, and in many ways, it is. These are the cavities that play hide-and-seek, developing in spots that are difficult or impossible to see during a casual glance in the mirror, or even during a basic visual exam by a dentist without specific tools. They are ‘hidden’ because they are shielded from direct view. The most common type of hidden cavity is the interproximal cavity, the one that forms on the smooth side surfaces of your teeth, precisely where they touch their neighbours. This contact point is a haven for plaque and bacteria, and since toothbrush bristles can’t effectively reach this area and floss isn’t always used correctly or consistently, decay can start and progress unseen between the teeth. On the outside, the enamel might look perfectly healthy, but underneath, decay is eating away at the tooth structure, spreading inwards. These cavities are visually confirmed almost exclusively through dental X-rays. On a radiograph (What Does A Cavity Look Like On An X-Ray?), the healthy tooth structure appears lighter (radiopaque), while the area of decay, being less dense, appears darker (radiolucent) – often as a triangular shadow or notch right at or below the contact point between two teeth. Another place where cavities like to hide is underneath existing dental restorations – fillings, crowns, inlays, or onlays. If the seal between the filling material and the tooth structure breaks down over time, tiny gaps can form. Bacteria can then sneak into these gaps and start a new area of decay underneath the restoration. This recurrent decay is hidden by the filling itself and might not be visible as a surface defect or discolouration until it’s quite advanced. Again, X-rays are critical for detecting decay under fillings, showing the darker shadow of decay beneath the restoration. Cavities can also hide just under the gum line, especially if there’s some slight gum recession, or on root surfaces if the gum has receded significantly, exposing the softer root cementum. These can sometimes be partially visible but are often difficult to see clearly without a dental mirror, good lighting, and retraction of the gum tissue. Lastly, decay can sometimes tunnel deep into the tooth from a seemingly small surface pit or fissure, spreading widely in the dentin underneath the enamel surface before a large visible hole forms. This “undermining” decay can be extensive internally while the external appearance remains relatively intact, making it a hidden threat until the unsupported enamel collapses. Because hidden cavities are, by definition, hard to see, they often progress significantly before they cause symptoms like pain or sensitivity, or before they become large enough to be visually apparent. This is a primary reason why regular dental check-ups with X-rays are essential for early detection – they reveal the silent, unseen threats lurking between teeth or under old dental work that you would never spot in your bathroom mirror.
What Does The Start Of A Cavity Look Like In A Child’s Tooth?
Understanding what tooth decay looks like is particularly crucial when it comes to children’s teeth (primary or “baby” teeth), because decay can progress much faster in little mouths. While the fundamental process of demineralization and cavity formation is the same as in adults, the enamel and dentin layers in primary teeth are relatively thinner and less mineralized than in permanent teeth. This means that once decay starts, it can spread more rapidly through the tooth structure, turning a small problem into a big one surprisingly quickly. The start of a cavity in a child’s tooth can look similar to early decay in an adult tooth: often, it begins as a white spot lesion, an area of demineralization on the enamel surface that appears chalky or opaque white. These are frequently seen on the smooth surfaces near the gum line, particularly on the upper front teeth, which can be affected by “baby bottle tooth decay” if children are given milk or juice bottles at night or frequently throughout the day. White spots can also appear in the pits and fissures of the back teeth, just like in adults. As the decay progresses, these white spots will stain brown or black, becoming more obvious. A small cavity in a child’s tooth might appear as a light brown or dark brown spot or a small pit in a groove. Because the decay moves faster, these small discolourations can quickly turn into visible holes. Parents might notice a greyish discolouration visible through the enamel, particularly on the side surfaces of teeth, indicating decay spreading within the dentin underneath. Given the rapid progression, what starts as a small spot can become a “bad cavity” with significant tooth destruction relatively quickly. Symptoms like sensitivity or pain might develop, though young children can sometimes have significant cavities without complaining, or they may not be able to articulate where the pain is from. Early detection is paramount in children because decay can damage not only the baby tooth but also potentially affect the developing permanent tooth underneath if the infection is severe. It can also lead to pain, infection, difficulty eating, and speech problems. Parents and caregivers should regularly lift the child’s lip to look for any white, brown, or black spots or changes in texture, especially near the gum line. However, routine dental check-ups for children, starting when the first tooth erupts or by age one, are the most effective way to catch decay early. Paediatric dentists are trained to spot these subtle signs and intervene quickly, often using preventative measures like fluoride varnish and sealants, in addition to fillings for cavities, to protect little smiles.
Does Black On Teeth Mean Cavity?
This is perhaps one of the most common misconceptions about tooth decay: “If it’s black on my tooth, it must be a cavity!” While it’s true that advanced cavities often appear black, that dark discolouration is not an automatic sentence of decay. There are several things that can cause black or dark spots on your teeth that are entirely unrelated to cavities. The most frequent culprit is staining. As we’ve discussed, coffee, tea, red wine, certain foods (like blueberries or dark sauces), and tobacco are potent staining agents. These pigments can accumulate on the enamel surface, particularly in the natural pits and fissures, making them appear dark, or along the gum line. These stains are superficial; they don’t represent a breakdown of the tooth structure underneath and can often be removed with professional dental cleaning (scaling and polishing) or sometimes with whitening treatments. Another source of dark spots can be related to dental materials. Amalgam fillings, the silver-coloured ones, are made of metal and naturally appear dark grey to black, especially as they age and tarnish. Sometimes, the metal can even slightly stain the surrounding tooth structure, making the tooth itself look darker. Old composite fillings might also stain over time, taking on a darker hue. Natural pigmentation or developmental anomalies can also cause dark spots. Some individuals have naturally darker lines or pits in their enamel grooves. These are part of the tooth’s anatomy, not decay. In rare cases, certain systemic conditions or medications can also cause intrinsic staining that makes teeth appear darker. So, how to differentiate? While difficult for the layperson, a dentist has ways to tell. A stained pit or fissure will usually feel hard and smooth when gently probed with an explorer, whereas a cavity will feel soft or sticky. Stains are typically flat or follow the natural contours of the tooth, while cavities often involve a change in contour, creating a pit or hole. The location is also a clue – while cavities favour certain spots, stains can be more widespread. Ultimately, the only way to know definitively if a black spot on your tooth is a cavity or just a stain (or something else) is to have it examined by a dental professional. They have the knowledge, the tools, and the diagnostic capabilities, including potentially using X-rays if decay is suspected, to make the accurate diagnosis and recommend the appropriate treatment, whether it’s just a cleaning or a filling.
What Does a Cavity Look Like On an X-Ray?
Stepping away from the visible surface, we enter the hidden dimension revealed by dental X-rays, or radiographs. These images provide a dentist with an invaluable tool for seeing what’s going on inside and between your teeth, in places that are completely inaccessible to direct visual examination. On a dental X-ray (or “What Does A Cavity Look Like On An X-Ray?”), teeth and bone appear in various shades of grey, determined by how much X-ray radiation they absorb. Denser structures, like healthy enamel and fillings made of metal or composite, absorb more radiation and appear lighter, ranging from white to light grey (clinically termed “radiopaque”). Less dense structures allow more radiation to pass through, appearing darker (“radiolucent”). This is the key to spotting cavities on an X-ray. Tooth decay is a process of demineralization – the loss of mineral density in the enamel and dentin. As the tooth structure loses minerals and becomes softer and more porous, it becomes less dense and therefore appears darker (radiolucent) on an X-ray compared to the healthy, denser surrounding tooth tissue. An interproximal cavity, for instance, which forms between teeth where you can’t see it, typically shows up on a bitewing X-ray (an X-ray that shows the crowns of your upper and lower back teeth together) as a triangular or notched darker area right at the contact point between the two teeth, often just below where the enamel caps meet. The darker shadow indicates the area where the tooth structure has been weakened by decay. Decay on the chewing surfaces (occlusal decay) or smooth surfaces can also be seen on X-rays, often appearing as a darker area beneath the enamel surface, particularly if it has spread into the dentin. X-rays are also crucial for revealing recurrent decay under existing fillings or crowns. On an X-ray, the filling material itself will appear lighter (often solid white for amalgam or a lighter grey for composite), but if decay is present underneath or around the margins, it will show up as a darker shadow adjacent to or beneath the restoration. The size and depth of the dark area on the X-ray give the dentist information about how far the decay has progressed through the enamel and dentin towards the pulp. While X-rays are incredibly useful, they have limitations. Very early decay, still confined to the outermost layer of enamel (the white spot lesion stage), might not be deep enough to show up as a distinct dark area on an X-ray. Also, the angle of the X-ray and the presence of overlapping structures can sometimes make interpretation challenging. Nevertheless, dental X-rays are an indispensable diagnostic tool, revealing the hidden threats of decay that visual inspection alone would miss, particularly those lurking between teeth and under restorations, making them a standard part of comprehensive dental check-ups.
What Do Healthy Teeth Look Like?
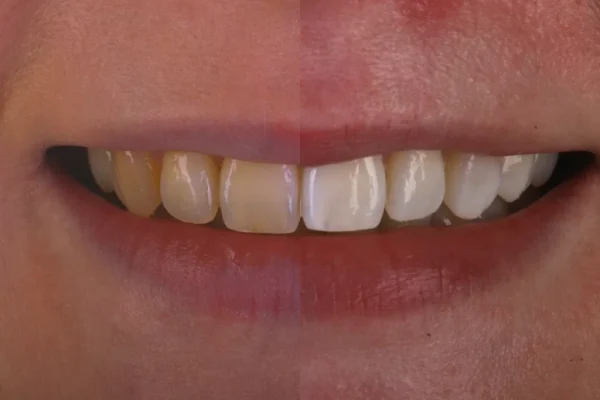
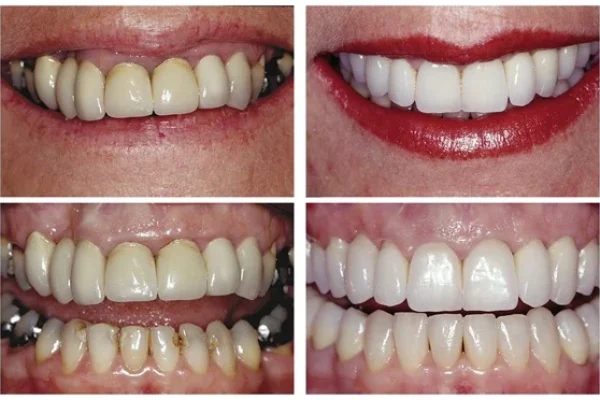
To truly understand what decay looks like, it’s helpful to have a baseline, a standard of comparison – what do healthy teeth look like anyway? Healthy teeth are the epitome of functional beauty, designed by nature to be strong, resilient, and aesthetically pleasing. When we talk about healthy teeth, the visual cues are centred around consistency, smoothness, and vitality. Firstly, consider the colour. Healthy enamel is the outermost layer and is naturally semi-translucent, allowing some of the underlying dentin’s yellowish hue to show through. This results in a colour that isn’t brilliant, artificial white, but rather a natural, consistent white or off-white shade throughout the tooth surface. There should be uniformity in colour, without significant discolouration, opaque white spots (which can indicate early demineralization), or dark brown/black areas (which can indicate decay or significant staining). The surface of healthy enamel should feel smooth and hard to the tongue or when gently probed. There should be no roughness, stickiness, or catches, except for the natural anatomy of pits and fissures on the chewing surfaces of back teeth. The shape should be intact, with defined cusps, edges, and smooth curves, without any visible pits, holes, or chipped/broken areas resulting from decay. Healthy teeth are firmly anchored in the jawbone, and while you won’t see the bone directly, its health is reflected in the stability of the teeth and the appearance of the surrounding gums. Speaking of gums, the gum tissue surrounding healthy teeth should look pink and firm, hugging tightly around the necks of the teeth. Healthy gums do not bleed easily when brushed or flossed and show no signs of swelling, redness, or recession that exposes the root surfaces. There should be no signs of infection, such as pus or persistent bad breath originating from a specific tooth. The spaces between healthy teeth should be clean and easily navigable with dental floss, without areas where floss catches or tears, which could indicate a cavity or a defective filling. Healthy teeth also function without pain or sensitivity under normal conditions; biting, chewing, and exposure to temperature changes should not cause discomfort. In essence, healthy teeth present a picture of structural integrity, consistent natural colour, smooth surfaces (with expected anatomical variations), and are supported by healthy, firm gum tissue, all functioning comfortably and without symptoms. This ideal visual standard provides a crucial point of reference when you or your dentist are examining your mouth for any deviations that might signal the presence of tooth decay or other dental problems.
Frequently Asked Questions About ‘what do cavities look like’
Okay, let’s cut to the chase and tackle the most pressing questions head-on, the ones that keep popping up when people wonder about those suspicious spots in their mouth. We’ve covered a lot of ground, diving deep into the appearance of decay at different stages and locations, but sometimes a quick, direct answer is needed. These are the common concerns, the burning questions distilled from the broader topic of “what do cavities look like.” It’s natural to look in the mirror and play detective, but as we’ve established, the mouth is a tricky place to self-diagnose. The visual signs can be misleading, and the absence of pain doesn’t mean the absence of a problem. Knowing the limitations of self-examination and understanding the nuances of how decay presents visually are key to taking appropriate action – which, almost always, means consulting a professional. Let’s break down some of the most frequently asked questions and arm you with clear, punchy answers based on what we’ve explored, reinforcing the critical takeaway messages about identifying potential issues and seeking expert evaluation. It’s about empowering you with knowledge, not turning you into an armchair dentist, but giving you the confidence to recognise when something isn’t quite right and needs attention. These FAQs serve as a quick reference, a summary of the essential points about spotting decay and understanding its visual language, ensuring the most critical information is easily accessible and memorable for anyone concerned about the health and appearance of their teeth.
How do you tell if it’s a cavity or not?
Determining definitively if something in your mouth is a cavity requires a professional assessment by a dentist. While you can look for certain visual cues like persistent discolouration (white, brown, or black spots that don’t brush off), changes in texture (roughness, stickiness, a catch), or visible pits/holes, these signs can also be caused by other things like stains, natural tooth anatomy, or old dental work. A dentist uses their expertise, visual examination (often with magnification and good lighting), tactile probing with a dental explorer to check for softness, and crucially, diagnostic tools like dental X-rays, which can reveal decay between teeth, under fillings, or in areas not visible to the eye. They combine these methods with your symptoms and history to make an accurate diagnosis. Therefore, if you suspect you have a cavity based on something you see or feel, the correct step is always to schedule an appointment with your dentist for a professional evaluation rather than trying to self-diagnose conclusively.
What can be mistaken for a cavity?
Several things in your mouth can visually mimic the appearance of a cavity, leading to confusion. Common culprits include:
- Stains: From coffee, tea, tobacco, or certain foods, which can appear brown or black, especially in pits and grooves or along the gum line. Unlike cavities, these are typically superficial and don’t represent a breakdown of tooth structure.
- Natural Pits and Fissures: The normal grooves on the chewing surfaces of back teeth can sometimes appear dark, either naturally pigmented or stained, but aren’t decay unless the tooth structure within them is soft or compromised.
- Old Fillings or Dental Work: Amalgam (silver) fillings are dark and can tarnish over time. The margins of old fillings or crowns can also collect stain, looking like decay around the edges (though actual recurrent decay can also occur here).
- Developmental Anomalies: Conditions like enamel hypoplasia can cause discoloured spots or lines that look different from healthy enamel but aren’t active decay.
- Calculus (Tartar): Hardened plaque, often stained dark, can resemble decay, though it typically forms along the gum line.
Because of these potential look-alikes, a professional dental examination is necessary to accurately distinguish a cavity from something benign or different.
What does a stage 1 cavity look like?
A Stage 1 early cavity, also known as an initial lesion or white spot lesion, is the earliest detectable sign of tooth decay. It typically appears as a chalky white or opaque spot on the surface of the enamel. This white appearance is due to the demineralization of the enamel – the loss of calcium and phosphate minerals caused by acid produced by bacteria. The area loses its natural translucency and appears duller than the surrounding healthy enamel. These white spots are often easiest to see when the tooth surface is dry. They are commonly found near the gum line or in the pits and fissures of chewing surfaces. At this stage, the outer enamel surface is usually still intact, meaning there is no physical hole yet. Stage 1 cavities are often painless and, importantly, are potentially reversible with good oral hygiene, dietary changes, and fluoride application, which helps to remineralize the weakened enamel.
Does black on teeth mean cavity?
No, a black spot on your tooth does not automatically mean you have a cavity. While advanced tooth decay often results in black discolouration as the decayed tooth structure and debris get stained, black spots can also be caused by other factors. The most common alternative cause for black spots is staining from food, drinks (like coffee, tea, red wine), or tobacco, particularly in the natural pits and grooves on the chewing surfaces. Amalgam (silver) fillings are also dark and can appear black. Natural pigmentation or staining around the margins of old dental work can also look like black spots. While you should certainly have any black spot examined by a dentist, only a professional can accurately determine whether the discolouration is superficial stain, a feature of old dental work, or active tooth decay requiring treatment.
Can you see cavities in the mirror?
Yes, you can sometimes see cavities in the mirror, but visibility depends greatly on the cavity’s size and location. Large cavities, especially those that have created a noticeable hole or are located on easily visible surfaces like the chewing surfaces of back teeth or the front surfaces of front teeth, can often be seen with good lighting and a mirror. However, many cavities, particularly in their early stages (like subtle white spots) or those located in difficult-to-see areas (like between teeth, under existing fillings, or deep in pits and fissures), are often invisible during a standard mirror examination. Hidden cavities between teeth, for instance, require dental X-rays for detection. Relying solely on a mirror means you are likely to miss smaller issues or those in less accessible parts of your mouth. Therefore, while a mirror is useful for noticing obvious changes, it is not a substitute for a professional dental examination, which uses specialised tools and diagnostics to provide a comprehensive view of your oral health.


